
Journal
Tame a Busy Background with a Sheer Paintstik Overlay

As I’ve been debating the fate of my Whole Cloth Collage project, my friends encouraged me to save the background, but find a way to tone it down. Of course! All it needs is an overlay. And for me, that means a Sheer Paintstik Overlay!
I could “see” how this would work in my head, but I’m always a bit leery of jumping straight to paint when I’ve got a lot of hours invested in a project. Here’s how I used a couple of photos and Adobe Illustrator to test my ideas.
[Tweet “Test a sheer Paintstik overlay with Illustrator before you paint.”]
Simulating a Sheer Paintstik Overlay
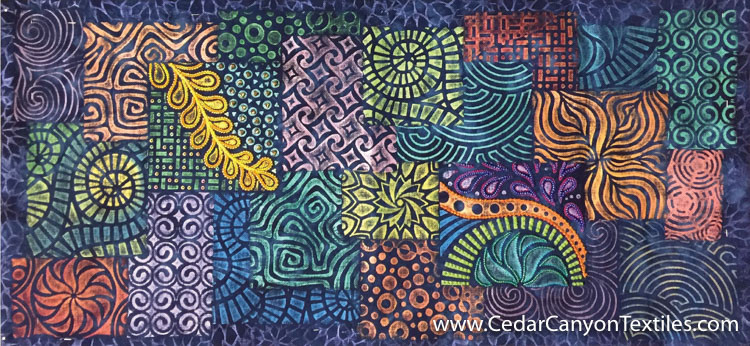
Painted fabric with too many “bright” sections
When I painted the fabric, I used lots of Iridescent Paintstik colors. As a result, there is a lot of “bright” and nothing feels like it is in the background. This piece desperately needed something to tone down the background.

Sheer overlays in an Illustrator drawing
I created a bunch of sheer colored rectangles in Adobe Illustrator rather than one solid color. While I was at it, I added a frame around each of the focal points.

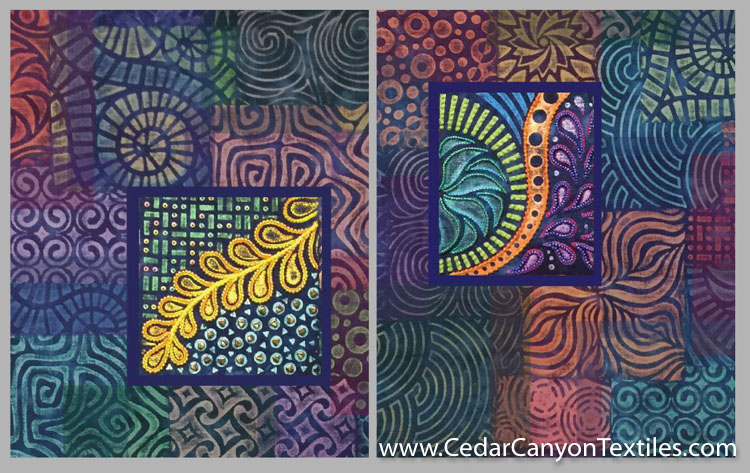
Painted fabric with sheer overlay and frames
When I looked at it all together, I loved the look of the sheer Paintstik overlay. It definitely toned the bright colors down and pushed them into the background. But those frames? They were a bit much.
Figuring Out the Frames
It was time to look at more options. Keep the frames? Remove them all together? I went back to the computer for another set of experiments.

Option 1: Sections with sheer overlay and no frames
When I removed the frames, it felt like something was missing. Plus, the painted section with the feather is a bit wonky. Some kind of frame would allow me to rotate this section just a bit to make it square with the rest of the piece.
Option 2: Sections with sheer overlay and dark frames
I went back to the dark frames, but they were too dark. They stuck out like a sore thumb when I stepped back from my screen to look at the photos.

Option 3: Sections with sheer overlay and muted frames.
Walking away is often the best way to handle a dilemma. I shipped the photos off to a friend for feedback, and came back the next day.
Back at the computer, I cut sections from the edge of my painted fabric and used those small sections to frame the embellished sections of the fabric. Oh yeah! I was on the right track!
In case you’re wondering, I didn’t actually “cut” any fabric for this part of my experiment. Rather than cutting the fabric, I cropped a section of the photo and used that to create my simulated frames. It got a little convoluted at times, but it worked.
[Tweet “Preview before you paint to save fabric, time – and tears!”]
Test, Then Paint
As much as I love to plow ahead on my projects, a detour through the computer can save me a lot of time and potential unhappiness. It’s nice to know I can preview my ideas without spoiling a lovely piece of art in the process.
For another look at testing a Sheer Paintstik Overlay, click over to this article in the blog.
Your Turn
Do you have a way to test ideas like a Sheer Paintstik Overlay? Chime in with a comment below. I’m always looking for more ideas!
Will you be showing us the completed design? I hope so!
Sincerely,
Judi
For sure, Judy!
When faced with the dilemma of how to add stitching to a painting. either take a picture of the work or place it directly on your printer and duplicate it on a sheet of photo transfer fabric. Add batting (or not) and test out your stitching ideas or thread colors.
That’s a fantastic idea, Merry! Thanks for sharing it with us.