
Journal
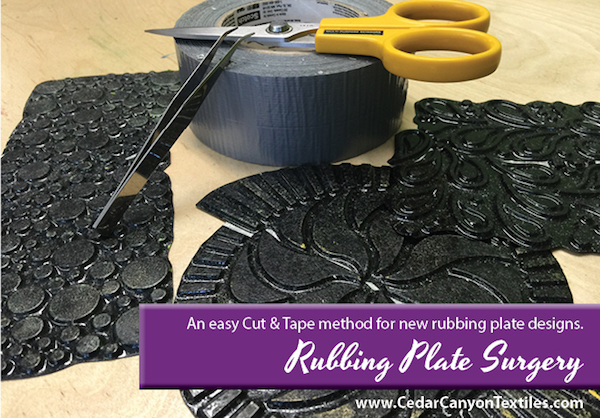
Rubbing Plate Surgery
Several years ago, when Zentangles were very much in fashion, I designed a set of rubbing plates I called Doodles. Many of the designs were divided into sections instead of having one distinct design for each plate.
[Tweet “Build your own textures with Rubbing Plate Surgery!”]
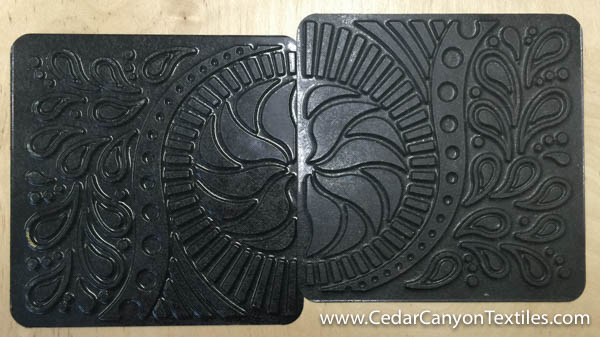
My favorite plate in the collection is the one with the half-circle swirl and feathers. I love these designs, but I’ve always wanted a plate with the full swirl and the lines radiating out from that shape.
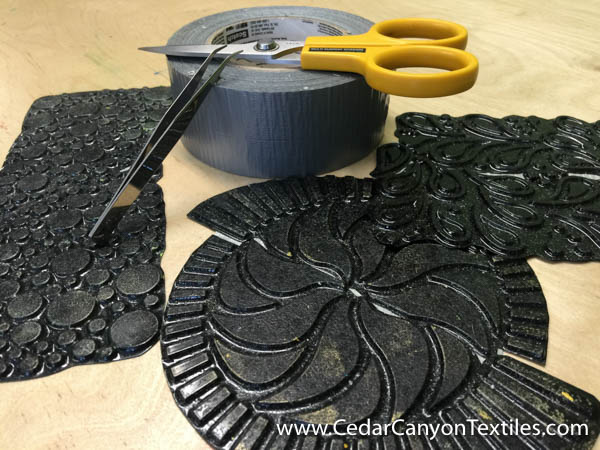
Having pondered this little problem for half of forever, I decided it was time for a little Rubbing Plate Surgery. I rustled up two copies of the same rubbing plate and cut the plates into sections. Don’t cringe – they are just rubbing plates! No blood was spilled during this surgery!
I carefully cut around the base of the shapes to get the two halves to snuggle together.
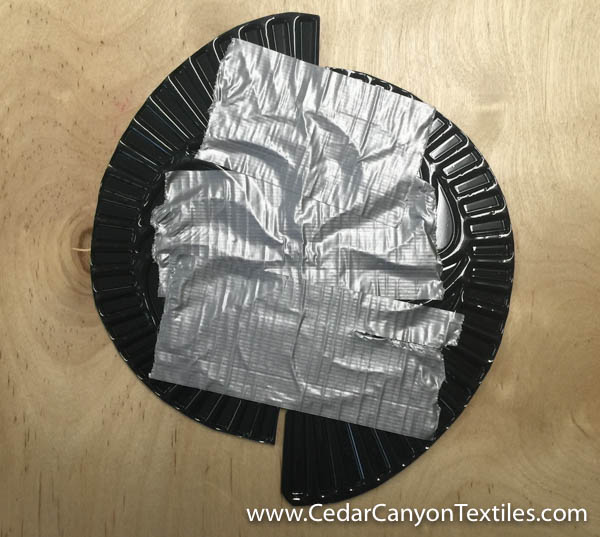
It’s pretty tough to stitch the plates together, so I scrounged through the utility room until I found a roll of duct tape. Easy peasy. Two pieces of duct tape and the plates were firmly stuck together.
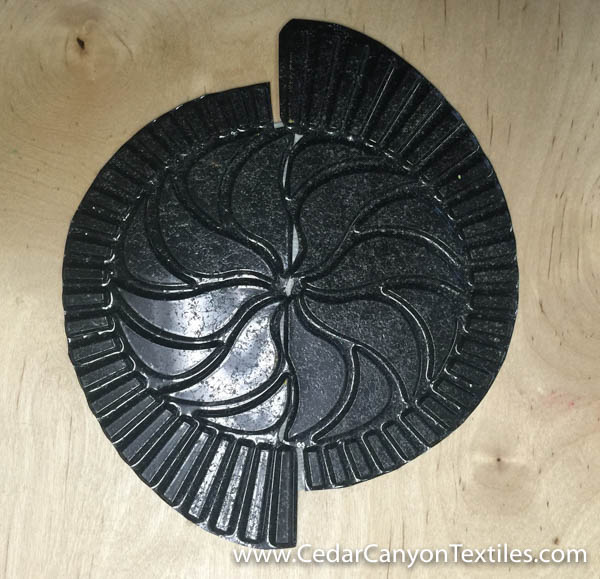
The plate looked pretty good from the top, so it was time for a test.
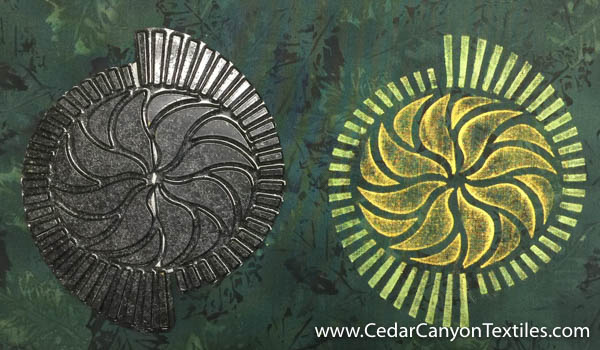
I grabbed a piece of fabric from the Ready-To-Paint pile and made a quick test. Woohoo! It was just what I wanted.
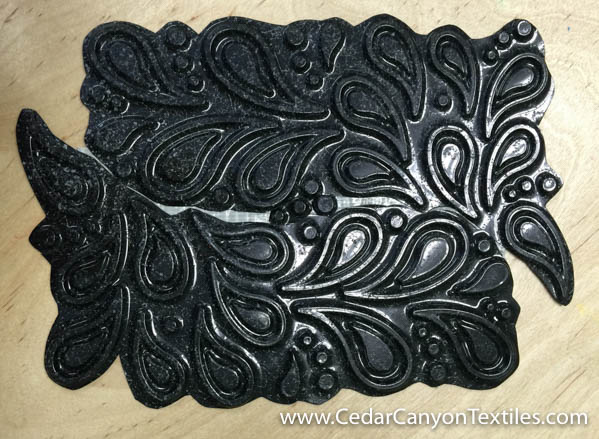
With one successful “surgery” under my belt, I plunged ahead with the second one. I cut around the feathers and found a way to nest them together.

I didn’t like the way two of the feather shapes stuck out at the ends, so I cut them off and snugged them in closer to the other shapes on the plate.
Rubbing Plate Surgery A Complete Success!
If you’ve been with me for a while, you know I’ve been working with rubbing plates for what seems like a gazillion years. So, what took me so long to figure this out? (On second thought, let’s not go there.)
In less than an hour, I was able to create three “new” rubbing plates for a new project. Now that’s something to get excited about!
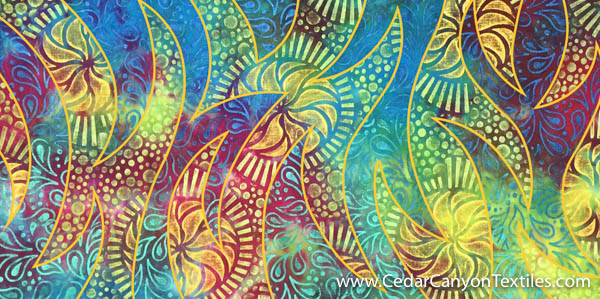
Finally, I put my new surgically altered rubbing plates to work on some fabric for a computer tote. I used a Two-Layer Mask (as described in Lesson 5 in the Whole Cloth Collage course) to create a very cool piece of fabric.
(Just so you know… I added the gold lines that separate the shapes in Photoshop. When the paint is dry, I’ll apply those lines to the fabric with lines of hand embroidery or machine stitching.)
Resources
Doodles Rubbing Plates (and tons of other goodies) are available from Laura Murray Designs and Artistic Artifacts.
Your Turn
Do you “surgically” alter your art supplies? Drop your stories in a comment below. I’d love to hear what you’ve been up to.
Hi, Shelly
Love this! A new technique to try out with ceramic clay. I have my scissors out now.
Cheers,
Jeanine
Oh yes, Jeanine… tons of possibilities for creating “new” textures for your clay work!
What a fantastic idea! whi would have thought?
Thanks.
Well… as a rubbing plate designer, it really should not have taken me quite so long to figure this one out… Better late than never!
Hi Shelley! So glad you are doing the “split plates” idea. I’ve been cutting my plates together for quite a while. But I usually don’t glue them together, I just use parts of the plate. I TOO, LOVE working with Shivas and plates. My favorite activity!
Thanks for all the good ideas.
It’s funny, Terre. I have cut plates apart in the past – and definitely trimmed the edges away to prevent painting errors. But I have to say it is much, much easier to work with the “parts” when they are taped back together. Then there is no guessing about how they are lined up under the fabric.
Great idea Shelley. Will use this idea in my next paintstiks class series.
That’s great, Linda. I’m so glad you can use this idea with your students. ?