
Journal
How I frame a Stitched Painting

Having completed five significant five large pieces with my Paint•Stitch•Bead technique, I decided it was time to figure out how to get from finished embroidery to finished art. In short, I had to learn to frame a stitched painting.
In earlier years, I turned my stitched paintings into quilted panels. But… the addition of beads to the equation makes quilting next to impossible. More importantly, I feel that my stitched paintings are “finished” just as they are. They really don’t need anything more!
Preparing the Frame

After looking at various options, I decided to stretch my pieces like a gallery-wrapped canvas. And that, of course, means that I need something to stretch the embroidery around. One of my artist friends stretches her pieces around a wood frame, and she introduced me to her carpenter. In just a few days, I had a stack of frames ready to go!

When I started playing with the fabric, it was clear that I needed a little bit of padding. Thankfully, I have some leftover bits of batting in my stash. I started with a piece of wool batting (the dark gray) cut to the size of the frame. Then I covered the whole thing with a piece of Thermore, a very thin polyester batt.

With a few staples to hold things together, it was time to move to the next step.
Find the Center
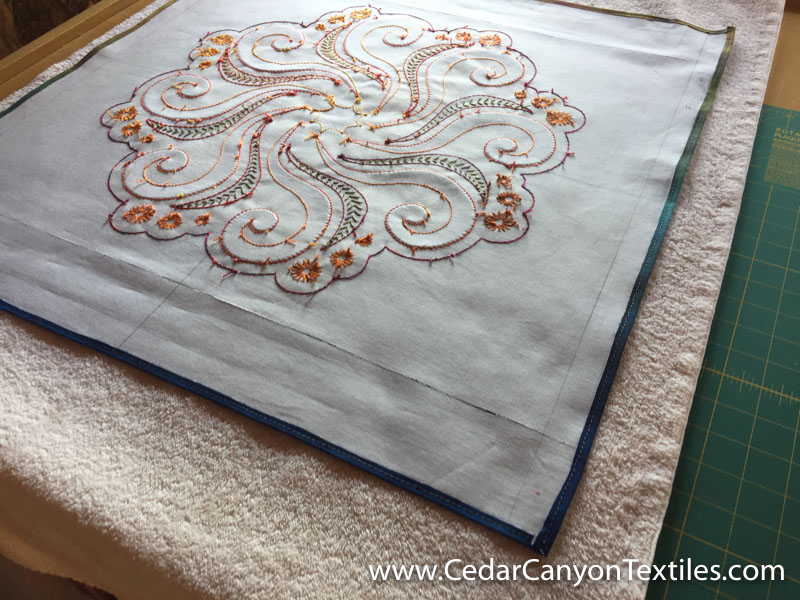
The first order of business was to find the center of the stitched painting and the center of each side. It turned out that I didn’t get things quite “square” to the edges of the fabric when I stenciled the design. So… that required some adjustments to figure out how the fabric should line up on the frame.
One thing to note is that my fabric is backed with a light, woven interfacing. The extra stability is a huge plus for this method of framing!

I attempted to stretch the pieces with my hands, but I’m just not strong enough to hold the fabric with one hand and use the staple gun with the other. To solve the problem, I ordered up canvas pliers. That old saying about the right tool for the job? It’s absolutely true!
Frame a Stitched Painting

Once the canvas pliers arrived, I was able to resume my adventure. And by golly – I learned how to frame a stitched painting! The corners are tricky, but I found a way to wrap them without trimming away the excess fabric.

After finishing off the last corner, I turned the piece over and did a little happy dance. Woohoo!

I was looking for a place to take a picture and had to laugh. My house has all stone walls – and most of them are curved! I took the piece to my neighbor’s house and borrowed a spot for a couple of quick photos.
I’m happy with the way the color continues around the sides of the piece.
 Better yet, I’m happy with the front. The gentle stretching ensures that the stitched painting is totally flat, and the layers of padding give just enough support to the center of the piece.
Now that I’ve learned to frame a stitched painting, I need to finish what I’ve started. One down and 4 – plus a few smaller pieces that I’ve been having fun with.
Thanks for reading. Your attention is the greatest gift you can give to a writer. I appreciate the invitation to be a small part of your creative world and hope you enjoy this little story.
If you’d like to join the conversation, leave a comment below.