
Journal
From Kaleidoscope Fabric To Beautiful Bag


In last week’s tutorial, I told you about my process for creating overlapping rubbings from the new Kaleidoscope plates. (Click here to read that article if you missed it.) This week, I am happy to show you my beautiful new handbag.
I love making handbags from fabric I create. They are one-of-a-kind bags that do not cost a fortune, and they are fun to make. My favorite bag pattern is the Candice Bag by Joan Hawley at Lazy Girl Designs. Candice is perfect for days when I want more than my wallet-on-a-string. (Yes, there is even a pocket big enough for my iPad.)
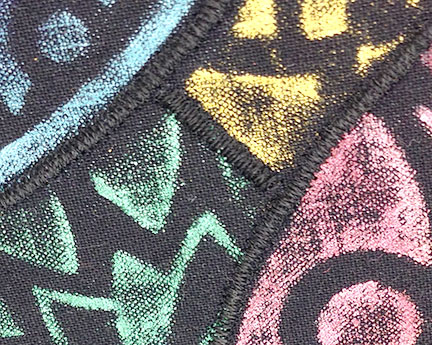
Before I constructed my bag, I satin-stitched around the outside of each of the medallions with black thread to match the background. The stitching is barely visible on the finished project, but it really cleans up the painted images and makes them look much more precise than they actually are.
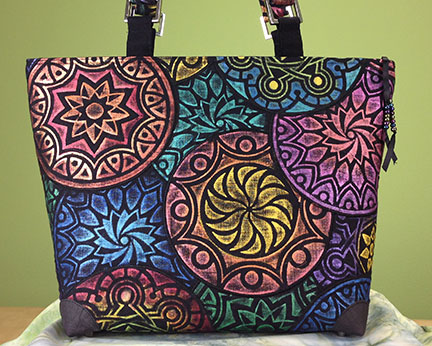
Here is the front of my bag. I love the big pocket on the front, especially when I am traveling.
The back of the bag has a little bit of quilting. I’m not fond of fusible batting, so I add a bit of quilting to hold the layers together.
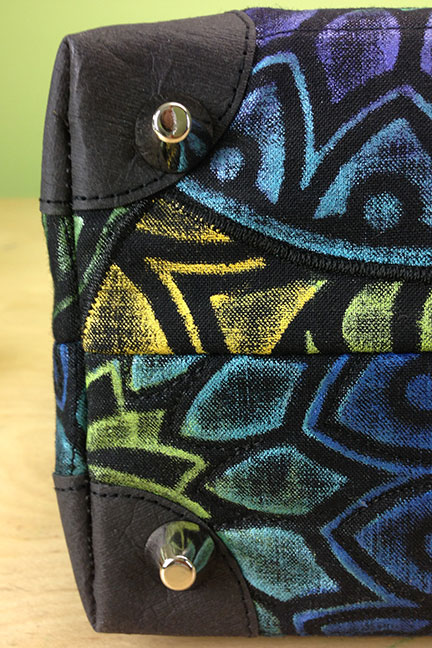
As much as I enjoy making my own bags, I do not enjoy the fact that the corners wear out long before the rest of the bag. The feet I added to my last bag helped, but the corners still wore out much too soon.
For this bag, I cut circles from black Kraft-Tex and stitched them into the bottom corners. It will be interesting to see if this gives me a longer-lasting bag.
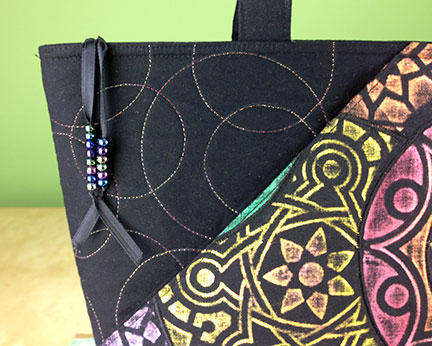
I debated about using a colored fabric for the bag front, but settled on black. To liven it up just a bit, I stitched a few circles from a metallic-wrapped thread and made a zipper pull from beads and ribbons I found in my stash.
Think Before You Stitch?
My bag projects always take longer than they should, especially when I experiment and add things that are not a part of the pattern. I know I want to add things like corner protectors and feet, but I don’t take time to think about WHEN they should be added
Then, of course, I wind up doing a fair amount of reverse-sewing — also known as ripping — and tugging far more fabric through my machine than necessary. After making this mistake yet again, I now have a big note in my pattern that says “STOP! Add corners and bag feet NOW!
Maybe, just maybe, I’ll get it right next time.
Update: Inside of Bag
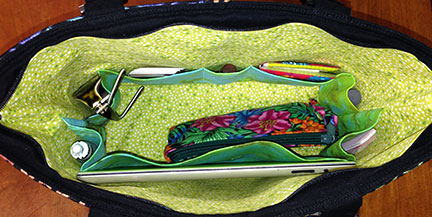
Now why didn’t I know that you would want to see the inside of the bag? For the curious, here it is.
I make the pockets pretty much straight from the pattern. Tall pockets on one side for the iPad, etc. Short pockets on the other side for phone, business cards, etc. I always choose a light/bright lining so I can actually see what is inside. My biggest complaint about commercial bags is that they almost always have black linings — and I can’t find a doggone thing. Not in this one!
Resources
I used the following to make my handbag:
- 3/4 yard of Kaleidoscope fabric
- Candice bag pattern from Lazy Girl Designs
- Glossy Nickel Rectangle Rings by Nancy Zieman for Clover
- Glossy Nickel bag feet
What a great bag idea! I made that bag in batiks for a family member. Using the Kaleidoscope fabric is dynamite. Thanks for sharing the idea!
Thanks, Alice! I’m very happy with the way it turned out. And hopeful that it will wear better with the super-duper corners. 🙂
I think this is one of the most beautiful bags I have ever seen.. Just love it.. The colors are amazing.. Perhaps I must give this a try.. Thanks for all of the tips..
You are so welcome, Fonda. Definitely give it a try!
Could you show pictures of the inside? Are there pockets? I prefer zippered pockets.
Hey Marlyn, I make the pockets pretty much straight out of the pattern. I added a photo above. The pockets are all added when the lining pieces are flat, so it would be no problem to add zipper pockets to your own liking.
So glad to hear that I am note the only one who forgets ” the order” for those little finishing idea.
Oh no, Marlene… you have lots of good company here. Once I start, I just want to charge right through. 🙂
Love it!! Inspired to do a bag soon.
Fabulous! Send me a photo when you get it done. I’d love to see what you come up with.
Awesome! I didn’t think that you could possibly cut up that fabric after painting it but you go and do it! It is inspiring me to come up with my own. I have lots of projects to finish up first but then I will be able to cut loose.
Hmmm… what good is a piece of fabric that can’t be used? No sense having it sit in the closet until it rots. 🙂
My Kaleidoscope fabric is ready to use for a laptop cover. I made the piece of fabric just the right size for this project but your bag idea looks great…maybe I’ll make one to match! Thanks for all your ideas and great products…I study every word that comes from you!
That sounds perfect, Sheila. Maybe that should be my next project. My laptop cover is pretty boring.